Email Security 101: Verifying the Authenticity of Received Emails on Gmail for Safe Communication
I'm an experienced person in the tech field. I have a total of 4years of working experience and have worked on more than 572+ projects. I mainly work as a Full Stack Web Developer, Server Administrator & Cyber Security Specialist.
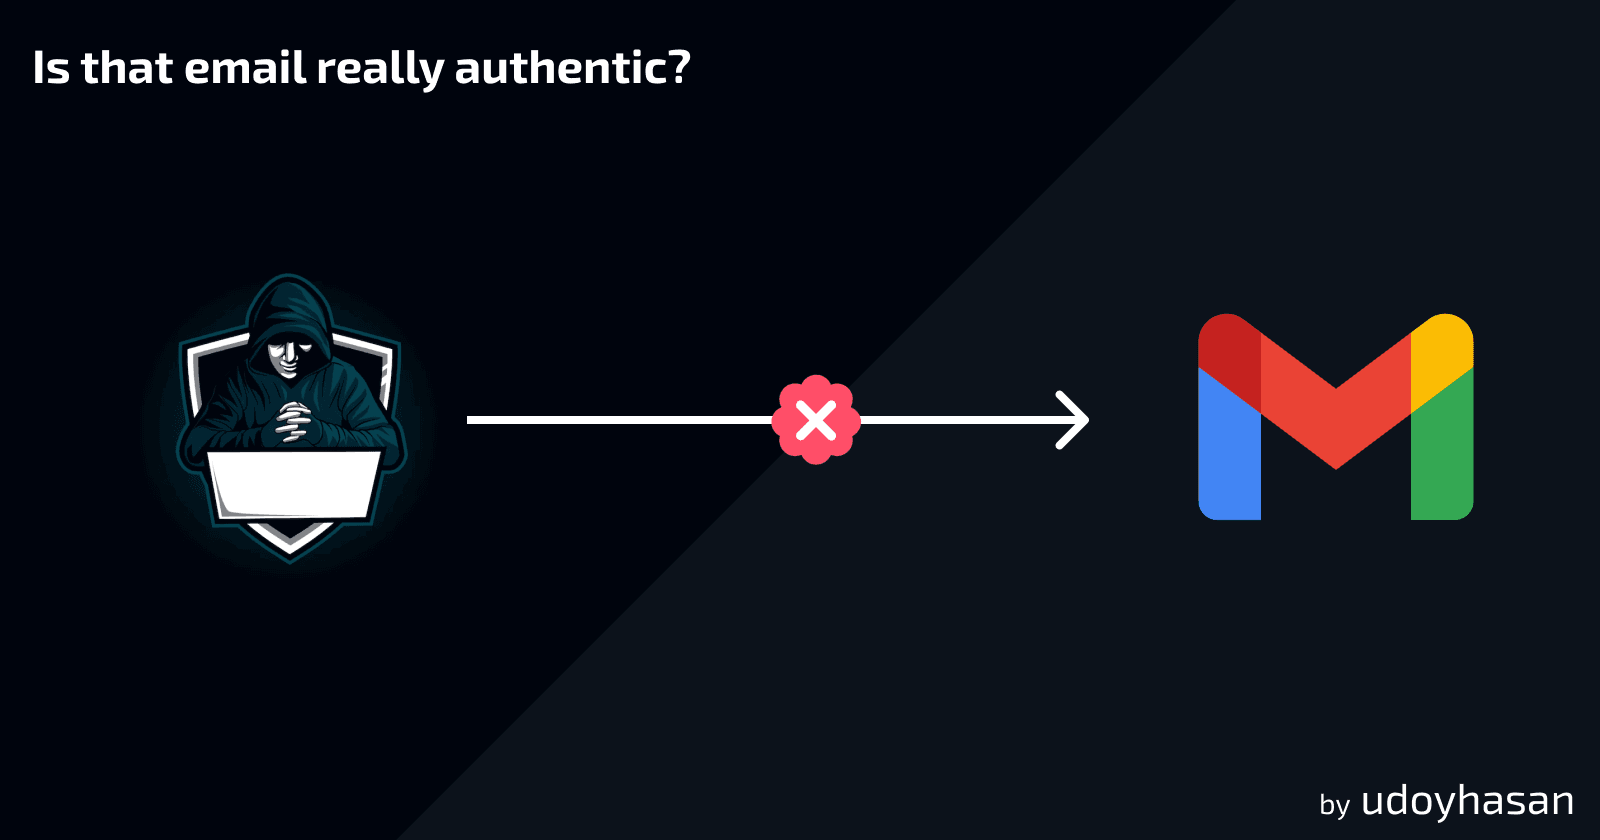
Email has become an essential part of our lives. We use it to communicate with friends, family, and colleagues, and for many of us, it's the primary means of conducting business. Unfortunately, with the convenience of email comes the risk of cyber threats. Phishing scams, malware, and other types of cyber attacks can put your personal and professional information at risk.
One of the best ways to protect yourself from these threats is to verify the authenticity of received emails. In this blog post, we'll discuss how you can do this on Gmail, one of the most popular email services in the world.
You can verify the authenticity of received emails by using both the browser and Gmail app.
Using web browser
To verify using a web browser you need to visit the official Gmail site (mail.google.com) and click on the email that you want to verify.
After that follow these steps:
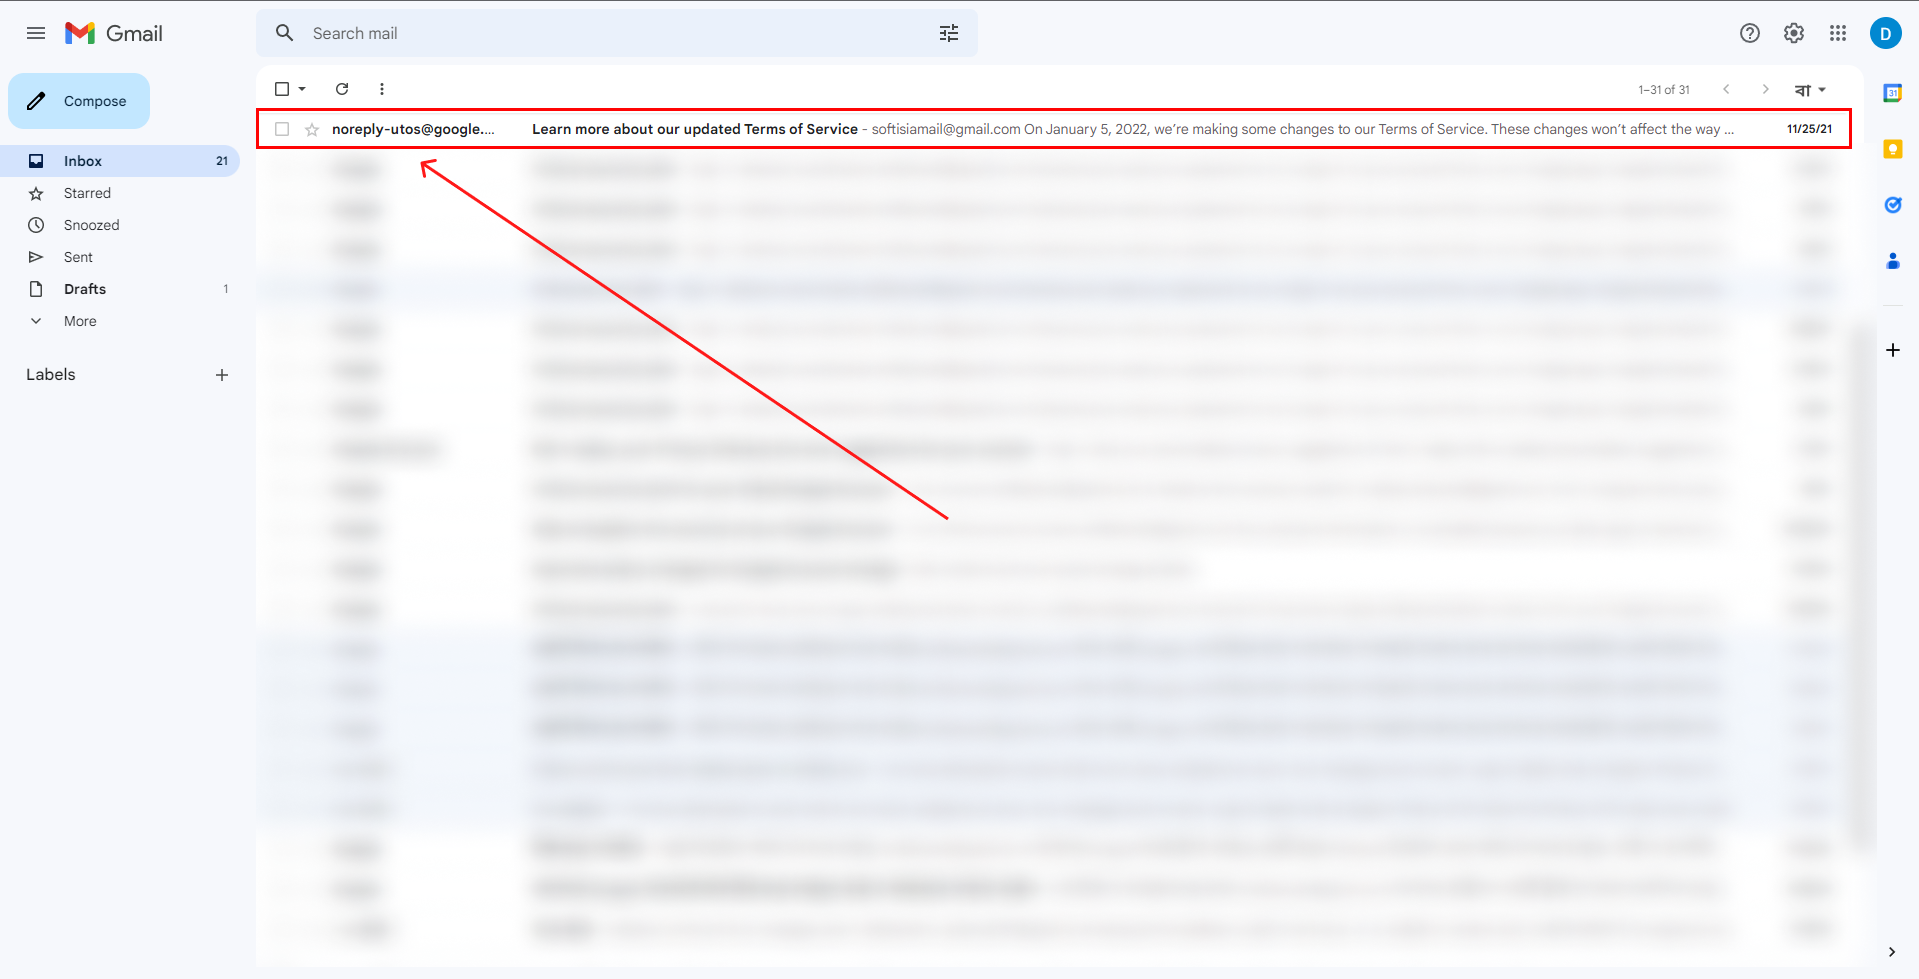
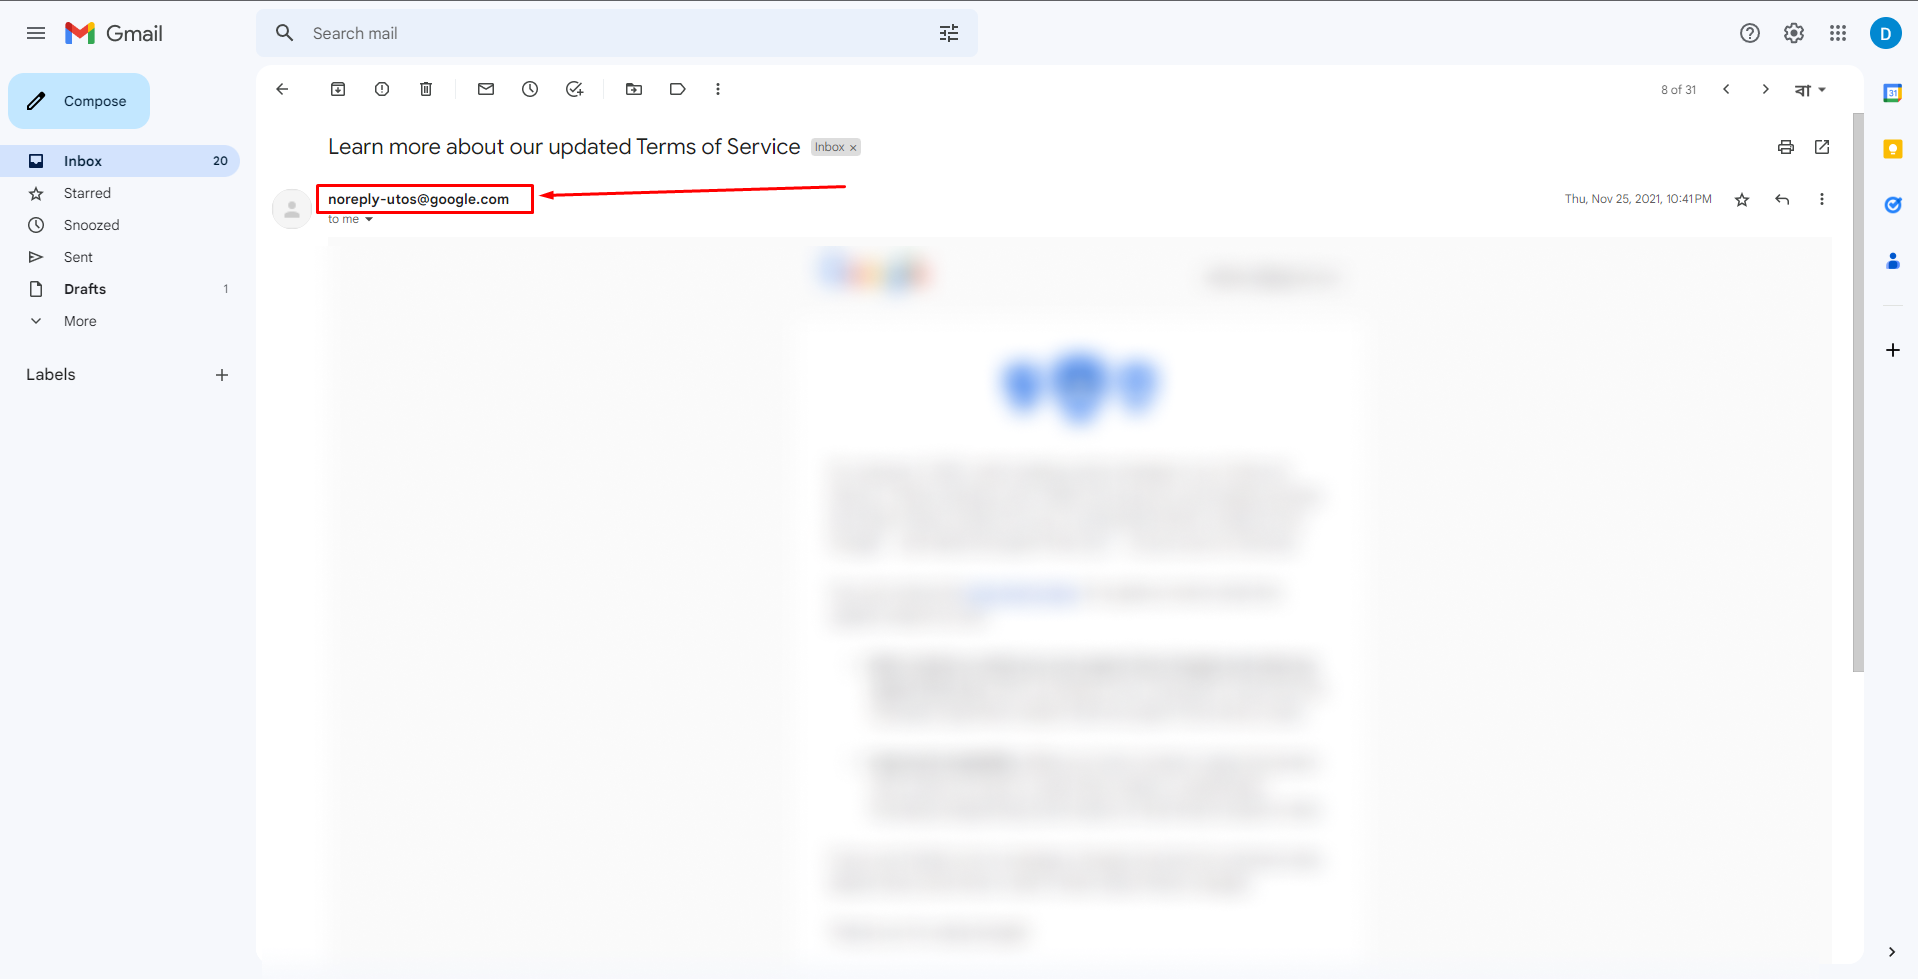
Step 1: Check the Sender's Email Address
The first step in verifying the authenticity of an email is to check the sender's email address. This is the address that appears in the "From" field of the email. If you know the sender, make sure that the email address is the same as the one you have on file. If you don't know the sender or if the email address is unfamiliar, proceed with caution.
Cybercriminals often use email addresses that look similar to legitimate ones, so be sure to scrutinize the address carefully. Look for misspellings, extra characters, or unusual domain names. For example, instead of "paypal.com," a phishing email may come from "paypa1.com" or "paypal-security.com."
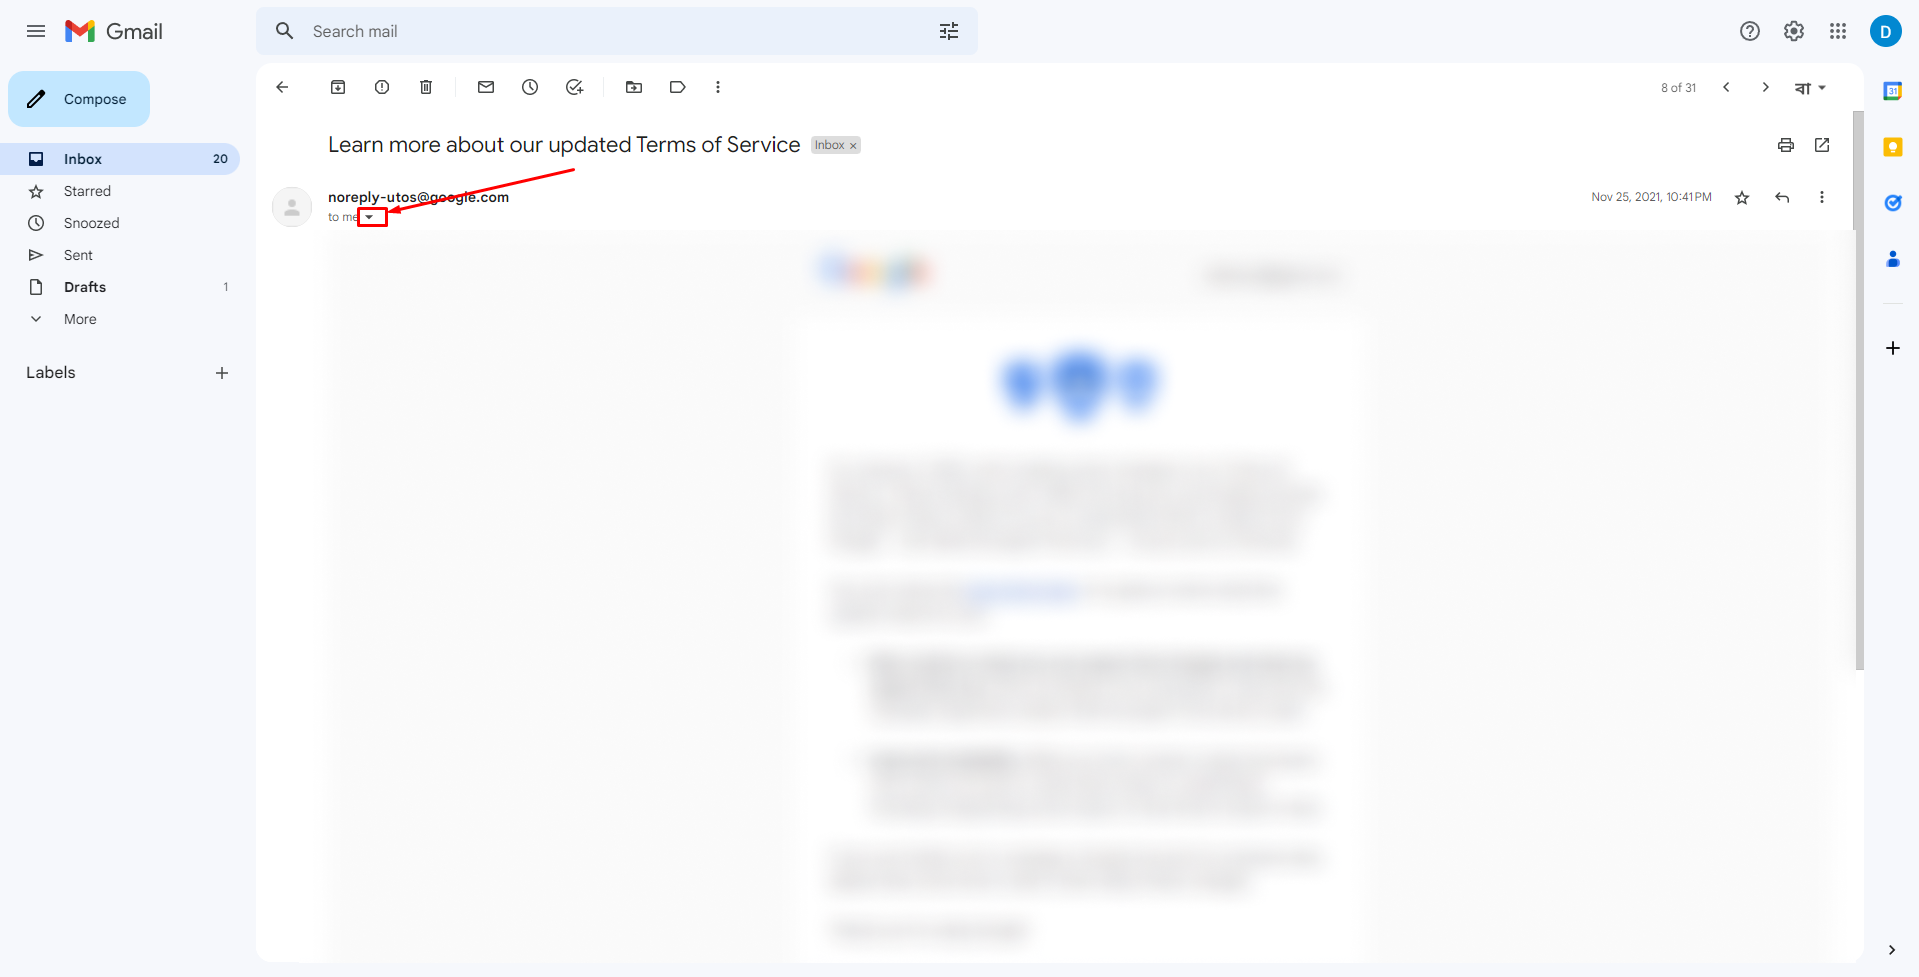
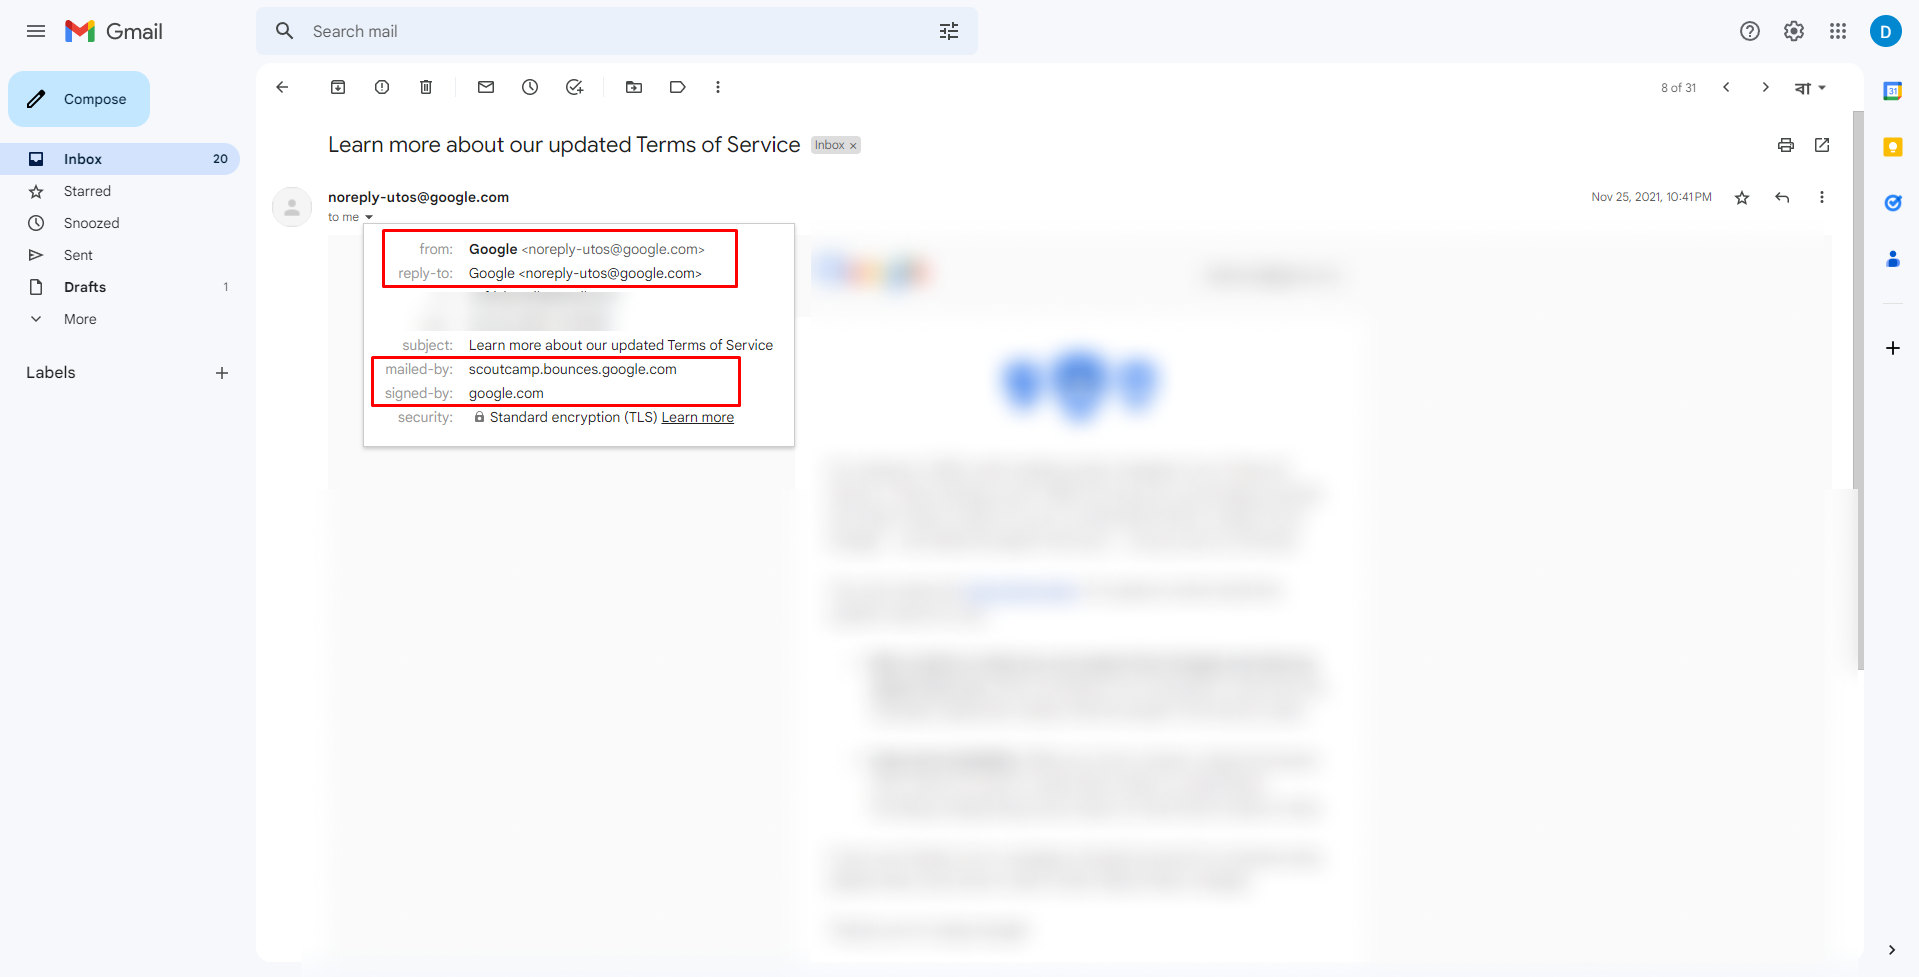
Step 2: Look for the "Mailed-By" and "Signed-By" Headers
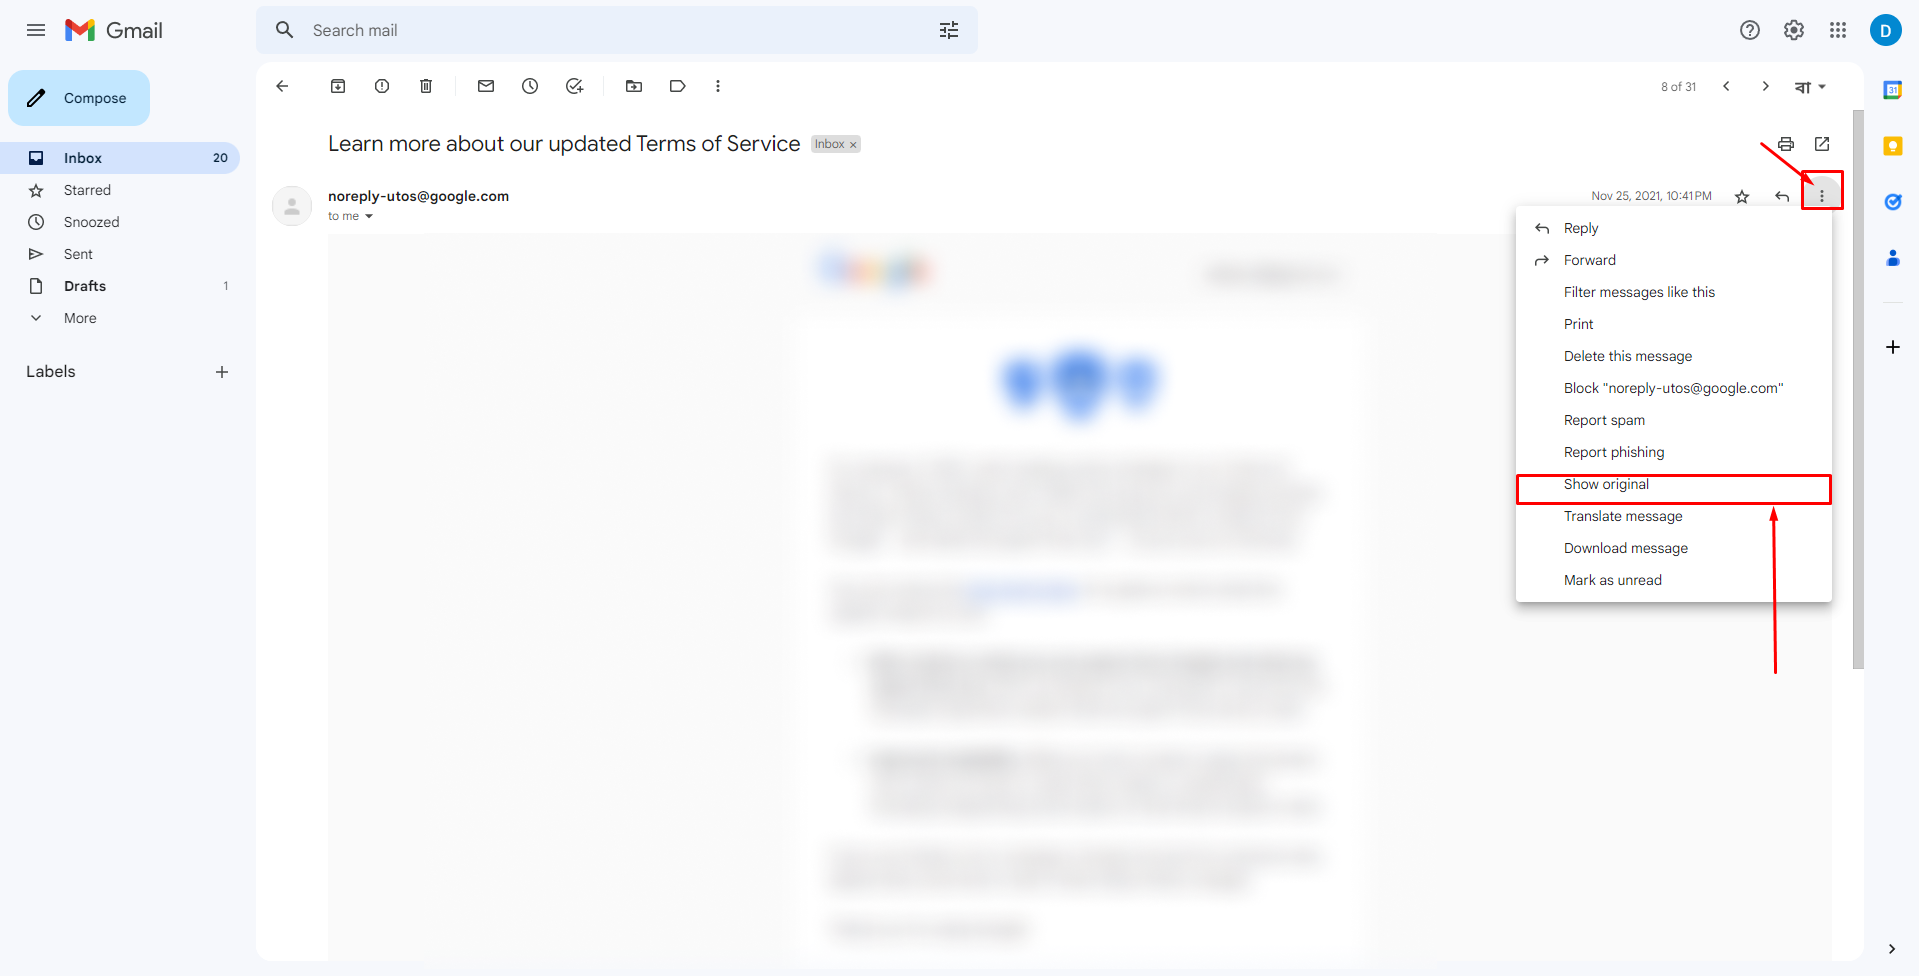
Gmail provides additional information about the email's authenticity in the headers. To access the headers, open the email and click on the three dots in the top right corner of the email window. From the drop-down menu, select "Show original."
The headers will appear in a new window. Look for the "mailed-by" and "signed-by" headers. If the "mailed-by" and "signed-by" headers match the sender's domain, it's a good sign that the email is legitimate. If the headers show a different domain, be cautious and investigate further.
Step 3: Check the Email's DKIM Signature (Advance)
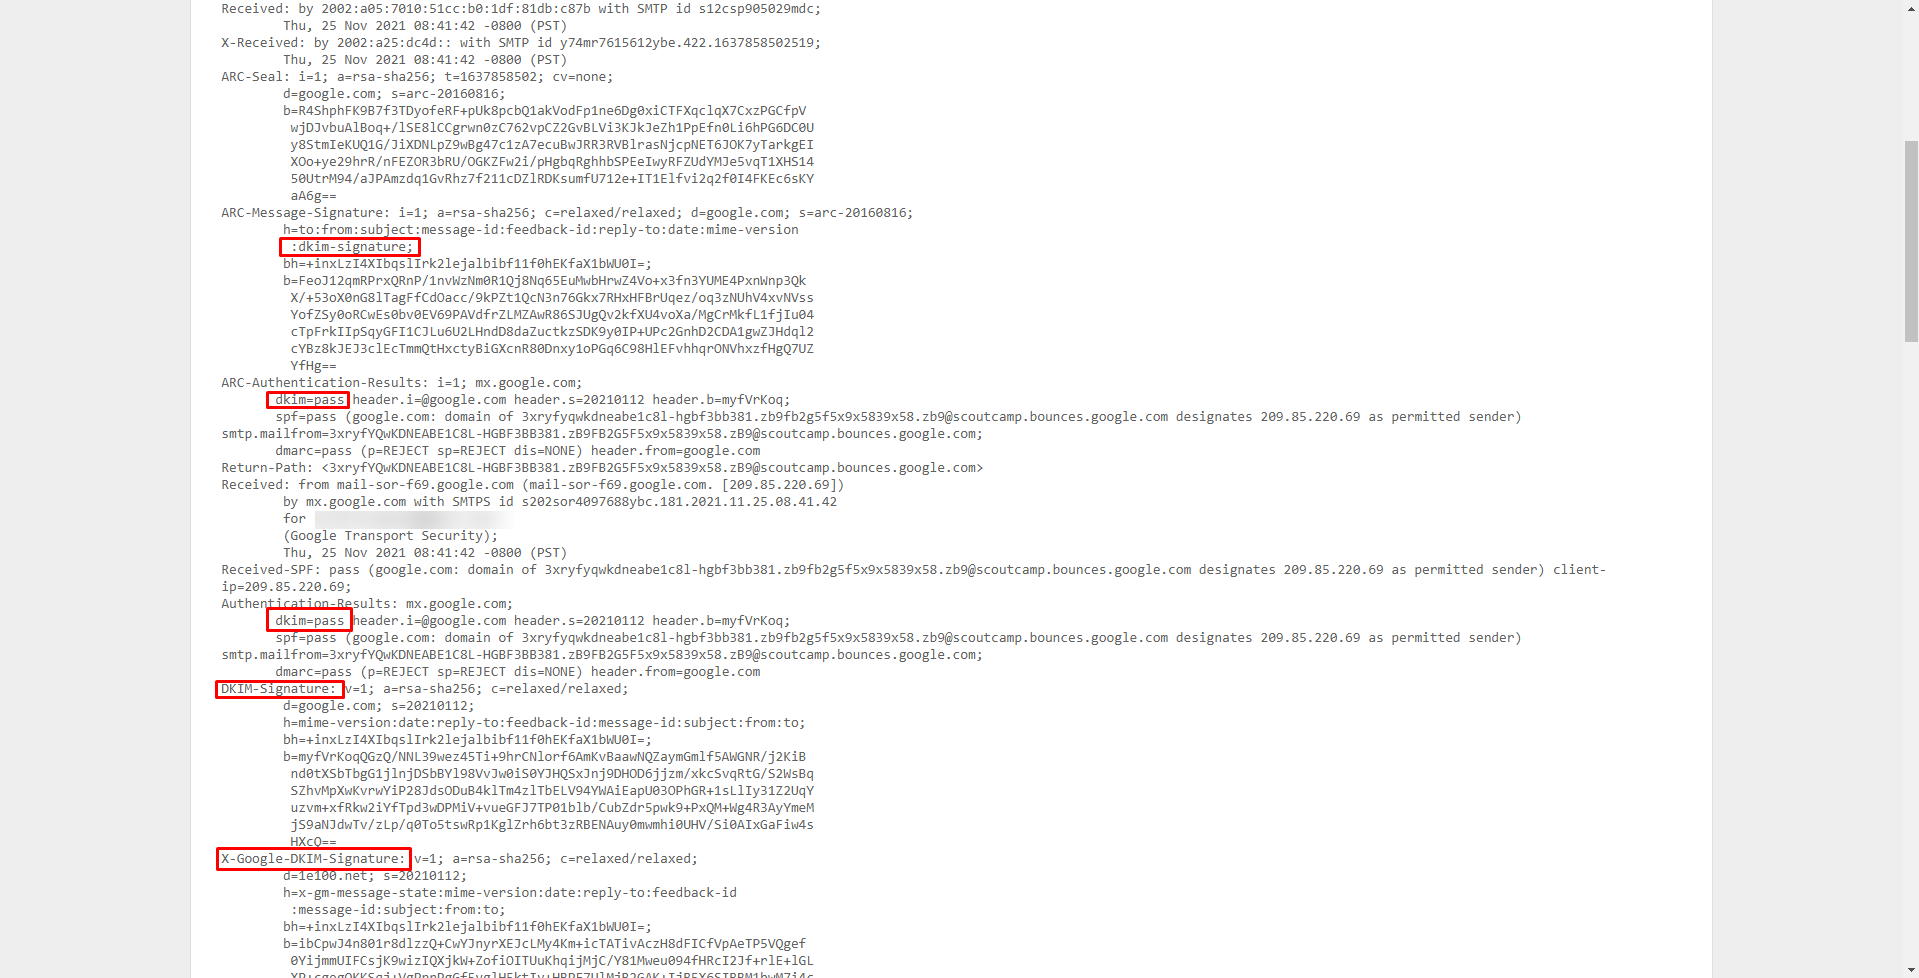
DKIM (DomainKeys Identified Mail) is a method for verifying the authenticity of an email message. It involves adding a digital signature to the email's header, which can be verified by the recipient's email server.
To check the email's DKIM signature on Gmail, open the email and click on the three dots in the top right corner of the email window. From the drop-down menu, select "Show original." Look for the "DKIM-Signature" header in the email's header. If the header is present and valid, it's a good sign that the email is legitimate.
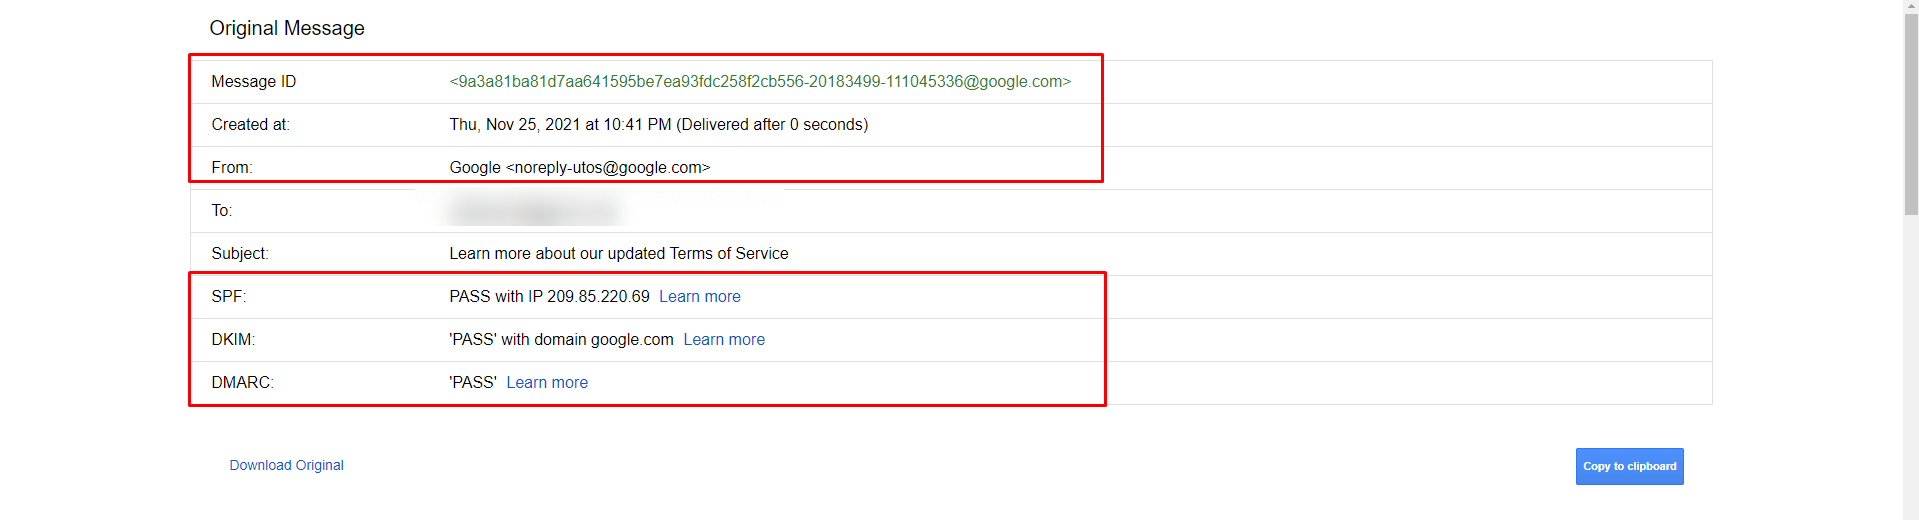
Now scroll down and try to search for "DKIM" and verify the result.
Step 4: Be Wary of Links and Attachments
Even if an email appears to be legitimate, be wary of links and attachments. Cybercriminals often use these to deliver malware or to trick you into providing sensitive information.
Before clicking on a link or downloading an attachment, hover your mouse over the link or attachment to see the URL or file name. If the link or attachment appears suspicious, don't click on it. Instead, contact the sender directly to verify the email's authenticity.
Step 5: Use Common Sense
Ultimately, the best defense against email scams is common sense. If an email seems too good to be true, it probably is. If you receive an unexpected email requesting sensitive information or asking you to take urgent action, be cautious. Verify the email's authenticity before taking any action.
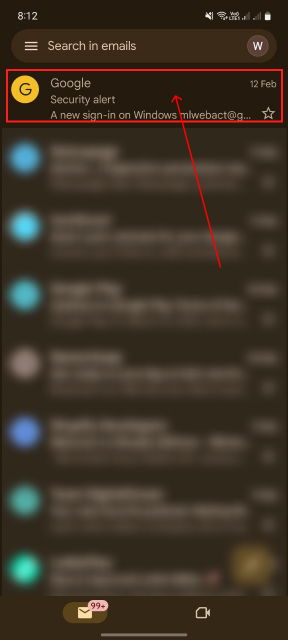
Using the mobile app
It is recommanded to use the web browser insted of mobile app for verifying email's authenticity as there you will find more options.
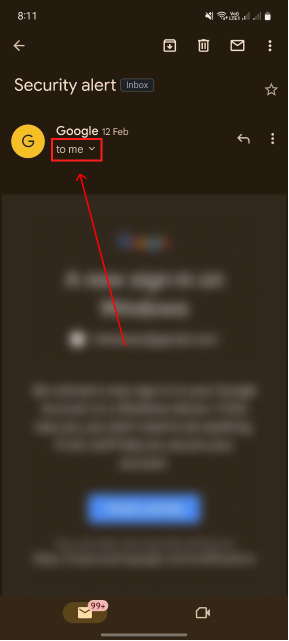
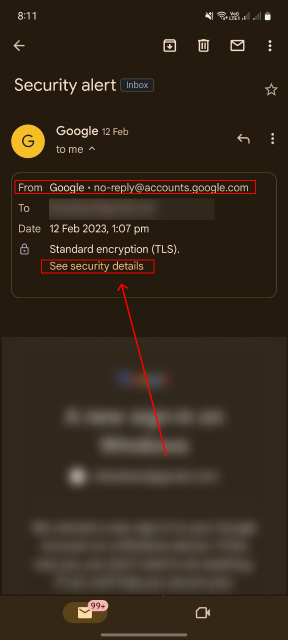
Open your Gmail app and log in to your Google account. Then select the email that you want to verify the authenticity. After that click on the arrow icon to see detailed information and verify the email's from address. Then click on See security details and verify the "Mailed By" & "Signed By" domains.

Conclusion
Email security is an essential part of protecting your personal and professional information. By verifying the authenticity of received emails on Gmail, you can minimize the risk of falling prey to phishing scams, malware, and other types of cyber attacks. Remember to check the sender's email address, look for the "mailed-by" and "signed-by" headers, check the email's DKIM signature, be wary of links and attachments, and use common sense. By following these steps, you can help ensure safe communication on Gmail and protect yourself from cyber threats.
In conclusion, email security is everyone's responsibility. By taking the time to verify the authenticity of received emails, you can do your part to stay safe online. Don't let cybercriminals trick you into divulging sensitive information or downloading malware. Stay vigilant and stay safe.